|
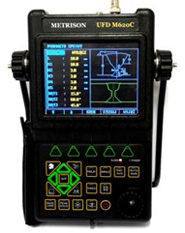
UFD M620C
ULTRASONIC FLAW DETECTOR
|
|

|
The UFD M620C is an advanced digital ultrasonic flaw detector featuring a multi-color TFT LCD (320 x 240 pixels) and a host of new features to meet challenging inspection requirements. It combines powerful flaw detection and measurement capabilities, extensive data storage, and the ability to transfer detailed inspection data to the PC via its high-speed USB port.
The instrument incorporates many advanced signal processing features including a 15MHz RF bandwidth to permit testing of thin materials, narrowband filters to improve signal to noise in high gain applications, a spike pulser for applications requiring higher frequencies, and a tunable square wave pulser to optimize penetration on thick or highly attenuating materials.
|
The instrument can be widely used in locating and sizing hidden cracks, voids, disbands, and similar discontinuities in welds, forgings, billets, axles, shafts, tanks and pressure vessels, turbines, and structural components.
Technical Datasheet UFD M620C
| Range: |
0 to 6000 mm in steel |
| Material Velocity: |
1000 to 15 000 m/s |
| Sensitivity: |
110 dB in selectable resolution 0.1, 1.0, 2.0, 6.0 dB |
| Amplifier Accuracy: |
+/-1 dB |
| Display Delay: |
-20 to 3400µs |
| Probe Delay/Zero Offset: |
0 to 99.99µs |
| Reject (suppression): |
0 to 80% full screen height |
| Damping: |
68 Ω, 100 Ω, 150 Ω, 500 Ω |
| Pulser: |
Tunable Square Wave Pulser from 0.1µs to 0.5µs |
| Pulse Energy: |
200V, 300V, 400V, 500V, 600V |
| Pulse Repetition: |
Frequency ranges from 10 Hz to 1000 Hz in 1 Hz increments |
| Test Modes: |
Pulse echo, dual element and thru-transmission |
| Display Modes: |
A-Scan, B-Scan |
| Rectification: |
Positive halfwave, negative halfwave, fullwave, RF |
| Gates: |
Two independent gates controllable over entire sweep range with visual and audible alarm |
| Flaw sizing: |
DAC (Distance Amplitude Correction), AVG (DGS), CSC (Curved Surface Correction), AWS D1.1 (Weld Rating) |
| Memory: |
Memory of 1000 channel files to store calibration set-ups.
Memory of 10000 wave files to store A-Scan patterns and instrument settings.
All files can be stored, recalled and cleared. |
| Units: |
Millimeter or inch |
| Language: |
Polish, English |
| Interoperability with external devices: |
PC interoperability through the USB serial interface |
| Power Supply: |
AC Mains 100-240 VAC, 50-60 Hz, Internal rechargeable Li-ion battery 7.2V, 8800 mAh |
| Continuous operation time (battery): |
Approx. 10 h |
| Weight (with battery): |
1.8 kg |
| Overall dimensions: |
280 x 215 x 65 mm |
| Operating Temperature: |
-10° to 50°C |
| Storage Temperature: |
-30° to 50°C |
Optional accessories
Ultrasonic probes:
We offer wide assortment of ultrasonic probes to enable a professional measurement.
If a standard probe cannot be used for your tests, you can order a custom-made probe from us.
|
|


